
Some help in this article on how to do your “diagnostics”
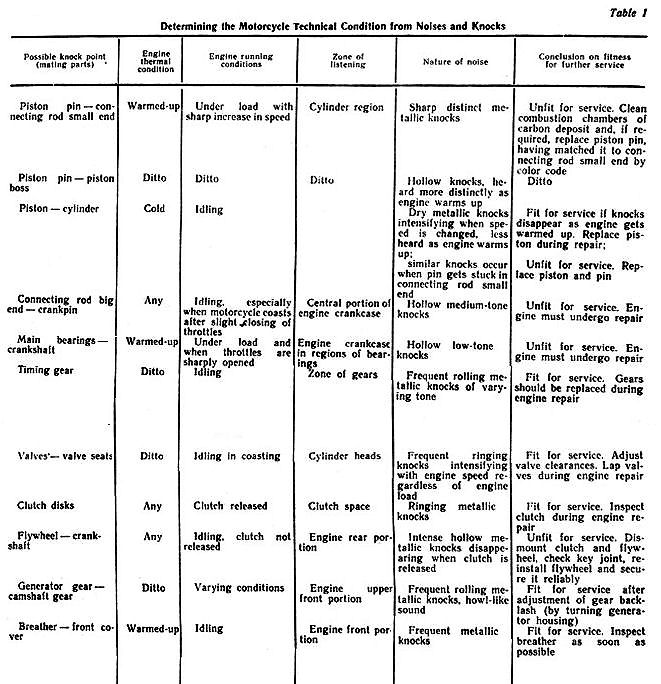
NOISES and KNOCKS
Like Roma says, “Assume Nothing!” If you have a noise or knock, you must find the cause and eliminate it. Some common ones are: Generator/Alternator/Timing gears slackened or damaged, Bent push-rod(s) or Bent/Sticking Valves, Piston Pin circlip come adrift, Broken piston ring(s), many other causes (see table below)
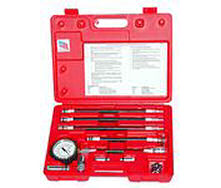
First thing is to do a compression check. A compression gauge is a handy item to have in your workshop, you can buy inexpensive ones at Super-cheap or pay a bit more for a quality one. It screws into the spark plug hole, you give the bike several kicks and note the pressure. Repeat on other side. Do it several times and average the readings. It’s good to record the findings in your workshop log. Check the compression on a warmed up motor with the throttle held fully opened. Readings should be around 90psi per cylinder or higher. Cylinder pressures should be within 5-10 psi of each other. You can do a test on a cold motor to get a rough idea of compression but its best done on a hot motor for accurate results.
Mind you, seen them still running fine with as little as 70psi per cylinder.
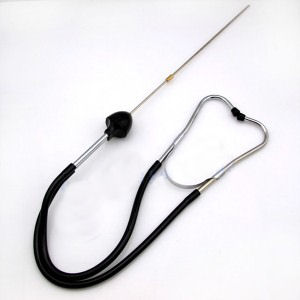
The use of a “sounding rod” (like a doctors stethoscope) is another extremely useful tool to have and is used for listening-in to your engine. Alternative is a large screwdriver up to your ear. Get to know your bike’s noises. Then when something starts to go wrong you will hear the change and possibly rectify things before they go pear-shaped. The table below is for Ural and Dnepr.
Over-advanced ignition timing is the cause of “pre-ignition” ,have you ever seen a motor that keeps running on after it’s been turned off, pinking away and shaking itself to pieces? That’s “pre-ignition” or over-advanced ignition timing. The worst knock is the one that you can’t hear! Inaudible pre-ignition at high speed is the commonest cause of holed pistons! Correct ignition timing is critical! So don’t try running a few degrees over-advanced thinking you will get more power. You might for awhile.. till you hole the pistons!
JD
(first posted 21 March 2002, edited, retrieved from the archives)
Running on one
To establish a bike really is only running on one cylinder. Start engine and pull the throttle cable on one side then the other. If they both pick up well then it really is only the tickover throttle stop or mixture screw that is the problem. However if one side picks up well and the other does little or nothing proceed as follows.
1. Remove and clean both plugs, make sure they are dry and then replace them. Leave the ignition off, flood or choke carbs equally and then give the bike 10 kicks. Remove both plugs and check to see if one is wetter than the other. If one is completely dry see the fuel supply advice.
2. Fuel supply – remove the rubber fuel pipe from carb and place a cup under it. Turn fuel on and check there is a good flow. Then check the other carb. They should both be the same or similar. If not suspect the tank tap and give it a clean. If there is similar flow see float valve.
3. Float valve – Drain carbs completely and remove floats and fuel supply pipe, spray a little WD40 up through the hole where the fuel enters to clear any obstructions from the float valve. While you are there and the WD40 is handy also spray any other jets you can see. Use the thin plastic tube that comes with the WD40 to make sure the WD40 goes through the jet rather than just over the outside of it. Reassemble carbs and connect fuel. Try starting the bike again. If it still runs on one see final fuel check.
4. Final fuel check – With the bike running on one, remove the pipe from the air cleaner to the non working carb. With the thin tube removed from the WD40, spray a little WD40 into the back of the offending carb from about 6 inches away. If this side suddenly cuts in but stops when you stop spraying then it still is a fuel problem as the bike is working by using the WD40 as fuel. If it is not then go to ignition checks.
5. Ignition checks – Remove both spark plugs and clean and dry them again. Put the left one in the right side and the right one in the left side. Restart the engine. If the fault has changed sides the problem is the plugs and they need replacing. If not go to coil checks.
6. Coil checks – Remove and clean the plugs and put them back in their original position. If they will reach, remove the plug lead from the left side at the plug end and place it on the right plug. Swap the other over as well. Restart the bike. If the fault has moved sides then it is either the coil, lead or cap which has failed on one side. So go to cap check.
7. Cap checks – Put the plug leads back to their original position and then remove both caps by unscrewing them from the lead. Swap the caps from left to right and re-attach them. Re-start the engine. If the fault has moved one of the caps has failed. If not go to lead check.
8. Lead check – Put the caps back to their original position and if you have a coil where the leads can be removed at the coil end. Swap the leads over at the coil end, but leave everything else as it was. Re-start the engine, if the fault has not moved sides then it is the plug lead. If it has moved it is the coil.
NOTE – if none of this works start swapping major components from one side to the other, like the whole carb until you get the fault to move sides.
by David Angel of F2 Motorcycles UK